


- Ensure you have NodeJS installed on your machine. If you haven't installed it yet, download it here: https://nodejs.org/en/download
- Create a new folder and navigate to your created folder in your terminal.
- Once you're inside your project directory, install Neurex using this command:
npm install neurex
Checkout the documentation for full API reference, live demos, and some starter examples here.
Neurex is a Javascript-based, deep learning for Node.js. It supports training on CPU and can also utilized GPU with the help of OpenCL if available. This library supports:
- 🧠 Easy model building through sequential stacking ✅
- 🛠️ Both CommonJS and ES module importing ✅
- 🔃 Retraining and transfer learning ✅
- ⚡ GPU acceleration for faster training ✅
- Modular - Built with a modular structure so you can easily extend.
- Simple To Use - Has intuitive, organized high-level APIs for beginners to use without needing to learn low-level machinery of the library.
- Educational - Good for experimenting or learning how to build Neural networks.
- Production-Ready - Stable for production use and easy model loading and inferencing.
Use built-in layers from the Layers class to build your model.
const { Neurex, Layers } = require('neurex');

(async () => {
    const nrx = new Neurex();
    const layer = new Layers();

    // stack layers in sequential order
    nrx.sequentialBuild([
        layer.inputShape({ features: 3 }),
        layer.connectedLayer(5), // layer size: 5, activation: relu (by default)
        layer.connectedLayer(5), // layer size: 5, activation: relu (by default)
        layer.connectedLayer(5), // layer size: 5, activation: relu (by default)
        layer.connectedLayer(10, 'softmax')
    ]);
})();The Layers class acts as a factory for generating neural network layer configurations. Here are some layers that are avaulable to use:
connectedLayer(layer_size: number, activation: string, useBias: boolean)
- Allows you to build a layer with number of neurons and the activation function to use in a layer. Stacking more layers will build connected layers or multilayer perceptron
layer.connectedLayer(5, 'tanh');convolutionalLayer(filters: number, strides: number, kernel_size: number[], activation_function: string, padding: string, useBias: boolean)
- Allows you to add convolutional layers in your model architecture in sequential building.
layer.convolutionalLayer(12, 1, [3, 3], 'relu', 'same'); // or use 'valid'embeddingLayer(vocabSize: number, embeddingDim: number, maxSequenceLength: number)
- Creates an embedding layer for token encoding.
layer.embeddingLayer(5000, 50, 10)maxPooling(poolSize: number[], strides: number, padding: string)
- is use for downsampling operation that reduces the spatial dimensions of an input tensor by taking the maximum value over a defined sliding window
layer.maxPooling([2, 2], 2, 'same'); // or use 'valid'recurrentCell(units: Number, activation_function: string, return_sequence: boolean, useBias: boolean)
- is the fundamental building block of a Recurrent Neural Network (RNN) designed to process sequential data. It maintains an internal
memoryby taking its output from the previous time step and feeding it back into itself alongside the new input.
layer.recurrentCell(18, 'tanh', true); // or false if the next layer in the stack is not recurrentreshape(targetSize: number[]);
- changes the dimensions (shape) of the data passing through it without changing the data values. This acts as the
connectorto bridge data from different layers (e.g: from connected layer to convolutional layer).
layer.reshape([28, 28, 1]);transConvLayer(filters: number, strides: number, kernel_size: number[], activation_function: string, padding: string, useBias: boolean)
transConv(or transpose convolution) is a specialized convolutional layer that upsamples incoming tensor map, which does the opposite of the normal convolution
layer.transConvLayer(3, 2, [3, 3], 'linear', 'same', false),simpleAttention(useBias: boolean)
simpleAttentionis the implementation of an attention layer in its simpliest and basic form.
layer.simpleAttention()multiHeadAttention(numHeads: number, useCasualMasking: boolean, useBias: boolean)
multiHeadAttentionis the advance and improved variant of the existingsimpleAttention. It splits Query, Key, and Value projections into multiple independent attention heads.
layer.multiHeadAttention(8, true, true)layerNorm(epsilon: number)
- normalizes the activations of the previous layer for each individual sample independently.
layer.layerNorm(1e-5) // default value is `1e-5`sinusoidalEncoding()
- Your classic sinusoidal positional encoding
layer.sinusoidalEncoding()residualStart()
- The
residualStartallows you to start the residual connection. It will cache the input to be use by theresidualEnd
layer.residualStart()residualEnd()
- The
residualEndmarks the end of the residual connection. It will add the cached input set by theresidualStartwith the output projected by earlier layers.
layer.residualEnd()For more info about layers, check the official documentation.
Here's an example on how you can use Neurex to train on XOR problem.
const {Neurex, Layers, optimizers, schedulers, gradientNormalizers, modelVisualizer, lossVisualizer, lossLandscapeVisualizer} = require('neurex');

const nrx = new Neurex();
const layer = new Layers();


(async () => {
    const trainX = [
        [0, 0],
        [0, 1],
        [1, 0],
        [1, 1]
    ]

    const trainY = [
        [0],
        [1],
        [1],
        [0]
    ];

    // configurations.  (Note: most of these options are just optional. This is to show the full option object only)
    nrx.configure({
        optimizer: optimizers.Adam(), // use built-in optimizers or plug your own optimizer function here!
        learning_rate: 0.001, // learning rate value
        mode: "cpu", // "gpu" or "auto"
        onFLoat32Module: true, // if set to true, the underlying core engine will use pure JS ops and no need to use "mode"

        visualizerPlugins: [ // visualizer plugins
            modelVisualizer(),
            lossVisualizer(),
            lossLandscapeVisualizer()
        ],

        onChange_optimizer: { // on change optimizer mechanism
            optimizer: optimizers.SGD(), // optimizer to use. Use built-in optimizers or plug your own optimizer function here!
            targetEpoch: 50 // target epoch
        },

        lr_scheduler: schedulers.stepDecay(), // built-in learning rate schedulers or plug your own schedulers

        // gradient normalizers
        gradient_normalizers: [
            gradientNormalizers.clipGradient()
        ]
    });


    // stack layers in sequential order
    nrx.sequentialBuild([
        layer.inputShape({ features:2 }),
        layer.connectedLayer(4), // layer size: 4, activation: relu (by default)
        layer.connectedLayer(1, 'sigmoid')
    ]);


    // you can show the summary of your model by calling modelSummary()
    nrx.modelSummary();

    // train the model
    await nrx.train(trainX, trainY, 'binary_cross_entropy', 1000, 2);

    // save model
    nrx.saveModel('model'); // this will be saved as model.nrx

    // predict
    const predictions = await nrx.predict(trainX);
    console.log(pedictions); // predicted outputs are in float32array. You may convert it to normal JS array if you need
    /*
    * Example:
    * [
    *   Float32Array(1) [ 0.2107422947883606 ]
    * ]
    */

    for (let i = 0; i < trainY.length; i++) {
        console.log('Predicted:',[predictions[i][0] > 0.5 ? 1 : 0], 'Actuals:',trainY[i]);
    }
})();While train() existed as a high-level API for convenience, Neurex exposes low-level primitive APIs that you can be use for writing custom training loops, offering full control of how you will train your model. By using feedforward(), getOutputlayerDelta(), backpropagation(), and updateParams(), you can create your own training loop and own training rules.
const {Neurex, Layers} = require('neurex');

const nrx = new Neurex();
const layer = new Layers();


(async () => {

    /** ... data preparation, dataset splitting, model construction and configuration ... */


    nrx.setParams(); // <- this is a MUST!

    let batchSize = 12;
    let totalEpoch = 10000;

    // epoch loop:
    for (let epoch = 0; epoch < totalEpoch; epoch++) {
        let batchLoss = 0;

        // batch loop:
        for (let batchStart = 0; batchStart < trainX.length; batchStart += batchSize) {

            let weightGrads, biasGrads; // instantiate accumulator variables to be reference later

            // loop through datasets:
            for (let j = batchStart; j < batchStart + batchSize && j < trainX.length; j++) {

                let input = trainX[j];
                let label = trainY[j];

                // feedforward:
                const {predictions, activations, zs} = nrx.feedforward(new Float32Array(input));

                // get output layer delta:
                const { outputLayerDelta, loss } = nrx.getOutputLayerDelta(predictions, label, zs, 'binary_cross_entropy');
                batchLoss += loss;

                // backprop:
                // the backprop must be placed inside the mini-batch loop to properly accumulate gradients internally before returnig the accumulated gradients.
                const {accumulatedWeightGrads, accumulatedBiasGrads} = nrx.backpropagation(activations, zs, outputLayerDelta);

                weightGrads = accumulatedWeightGrads;
                biasGrads = accumulatedBiasGrads;

            }

            // model param update:
            // model parameter update must be placed outside mini-batch loop to get the accumulated gradients across batches
            // internally, this method do scaling gradients and normalizing gradients before updating them using an optimizer.
            nrx.updateParams(weightGrads, biasGrads);
        }

        console.log(`Epoch ${epoch+1} finished... Loss: ${((batchLoss /= batchSize).toFixed(7))}`);
    }

    // await nrx.train(trainX, trainY, 'binary_cross_entropy', 10000, 12); // commented out to demonstrate custom training loop

    // predict
    const predictions = await nrx.predict(trainX);

    console.log(predictions);
})();
Having those exposed APis and writing custom training loops could theoretically allows you to train multiple model architecture at once or train a GAN-like network model.
One thing to note though - when writing custom training loop, expect that the features that the train() method uses, like using of visualizer tools and learning rate schedulers, etc. will not take effect (yet). The core training APIs only does the process of forwarding the input where even lower-level internals does the processing of data when calling them, traversing the error, and updating the model parameters.
Saving models is very straightforward.
const {Neurex, Layers} = require('neurex');

(async () => {

    const nrx = new Neurex();

    // ... data preprocessing, layer stacking, configurations, train()

    await nrx.saveModel()
})()
Your model will be saved in a binary file which can be use later on.
Note: nrx (or neurex) models are exclusive model file format in Neurex only.
To load .nrx models, you can use loadSavedModel(). This will load and recontruct your trained model
const { Neurex, Layers } = require('neurex');

(async () => {
    const nrx = new Neurex();
    const layer = new Layers();

    await nrx.loadSavedModel("model.nrx");

    nrx.modelSummary(); // prints the model summary
})();
To remove and add a new layer, use pop() and add_layer(). These methods are essentials if you do transfer learning
const { Neurex, Layers } = require('neurex');

(async () => {
    const nrx = new Neurex();
    const layer = new Layers();

    await nrx.loadSavedModel("model.nrx");
    nrx.pop();

    // calling more pop() will remove every last layer
    // nrx.pop();
    // nrx.pop();
    // nrx.pop();
    nrx.add_layer(layer.connectedLayer(3,'softmax')) // append a new layer with untrained parameters

    nrx.modelSummary(); // prints the model summary
})();
You can now also export trained nrx models to ONNX to use it on any environment that supports ONNX runtime. This can be done easily using the export_to_ONNX() method in Neurex.
nrx.export_to_ONNX("model"); // this will be saved as model.onnxNote: this is yet an experimental proof-of-concept showing that it is possible to export to ONNX. This SHOULD NOT be a replacement for the native neurex (.nrx) model as there are no method or functions yet to map back trained models from ONNX to Neurex model internal semantics.
Want to train a model immediately? The templates module offers curated templates you can use which you can drop in to the sequentialBuild() method.
const { Neurex, Layers, templates } = require('neurex');

(() => {
    const nrx = new Neurex();
    const layer = new Layers();

    nrx.sequentialBuild([
        layer.inputShape({features: 2}),
        // drop in a connected network having 3 hidden layers, 5 neurons each
        templates.simpleNeuralNetwork(),
        layer.connectedLayer(1, 'sigmoid')
    ])
})();
const { Neurex, Layers, templates } = require('neurex');
(() => {
const nrx = new Neurex();
const layer = new Layers();
nrx.sequentialBuild([
layer.inputShape({features: 2}),
// drop in a convolutional network. If "isHeadless" parameter is set to true, the funnel-shape connected layer will be removed. Default is `false`
templates.simpleCNN(isHeadless = true),
layer.recurrentCell(18, 'tanh', true),
layer.recurrentCell(18, 'tanh', true),
layer.recurrentCell(18, 'tanh'),
layer.connectedLayer(1, 'sigmoid')
])
})();const { Neurex, Layers, templates } = require('neurex');
(() => {
const nrx = new Neurex();
const layer = new Layers();
nrx.sequentialBuild([
layer.embeddingLayer(5000, 50, 10),
templates.vanillaRNN(18, 'relu'),
layer.connectedLayer(1, 'sigmoid')
])
})();Learn more about neural network templates here.
Thanks to the updated core engine and flexible API, you can now write and plug your own optimizer and learning rate scheduler!
const { Neurex } = require('neurex');

function MyOptimizer() {
    return function AwesomeOptimizer(data) {
        // destructure to extract the data use for computation
        // tip: log the whole data object to know what the engine gives you for optimizing params
        const { params, grads, state: state = {}, lr } = data;


        // your actual implementation...


        // ALWAYS RETURN UPDATED PARAM AND STATE
        return {
            params: params,
            state: state,
        };
    };
}

function CustomScheduler() {
    return function scheduler(data) {
        // destructure to extract the data use for computation
        // tip: log the whole data object to know what the engine gives you for calculating new learning rate
        const {current_epoch, learning_rate, previousEpochLoss } = data;

        // your actual implementation...

        // ALWAYS RETURN NEWLY CALCULATED LEARNING RATE
        return updated_learning_rate;
    }
}


(() => {
    const nrx = new Neurex();

    nrx.configure({
        optimizer: MyOptimizer(),
        lr_scheduler: CustomScheduler(),
        /* other configs */
    });
})();
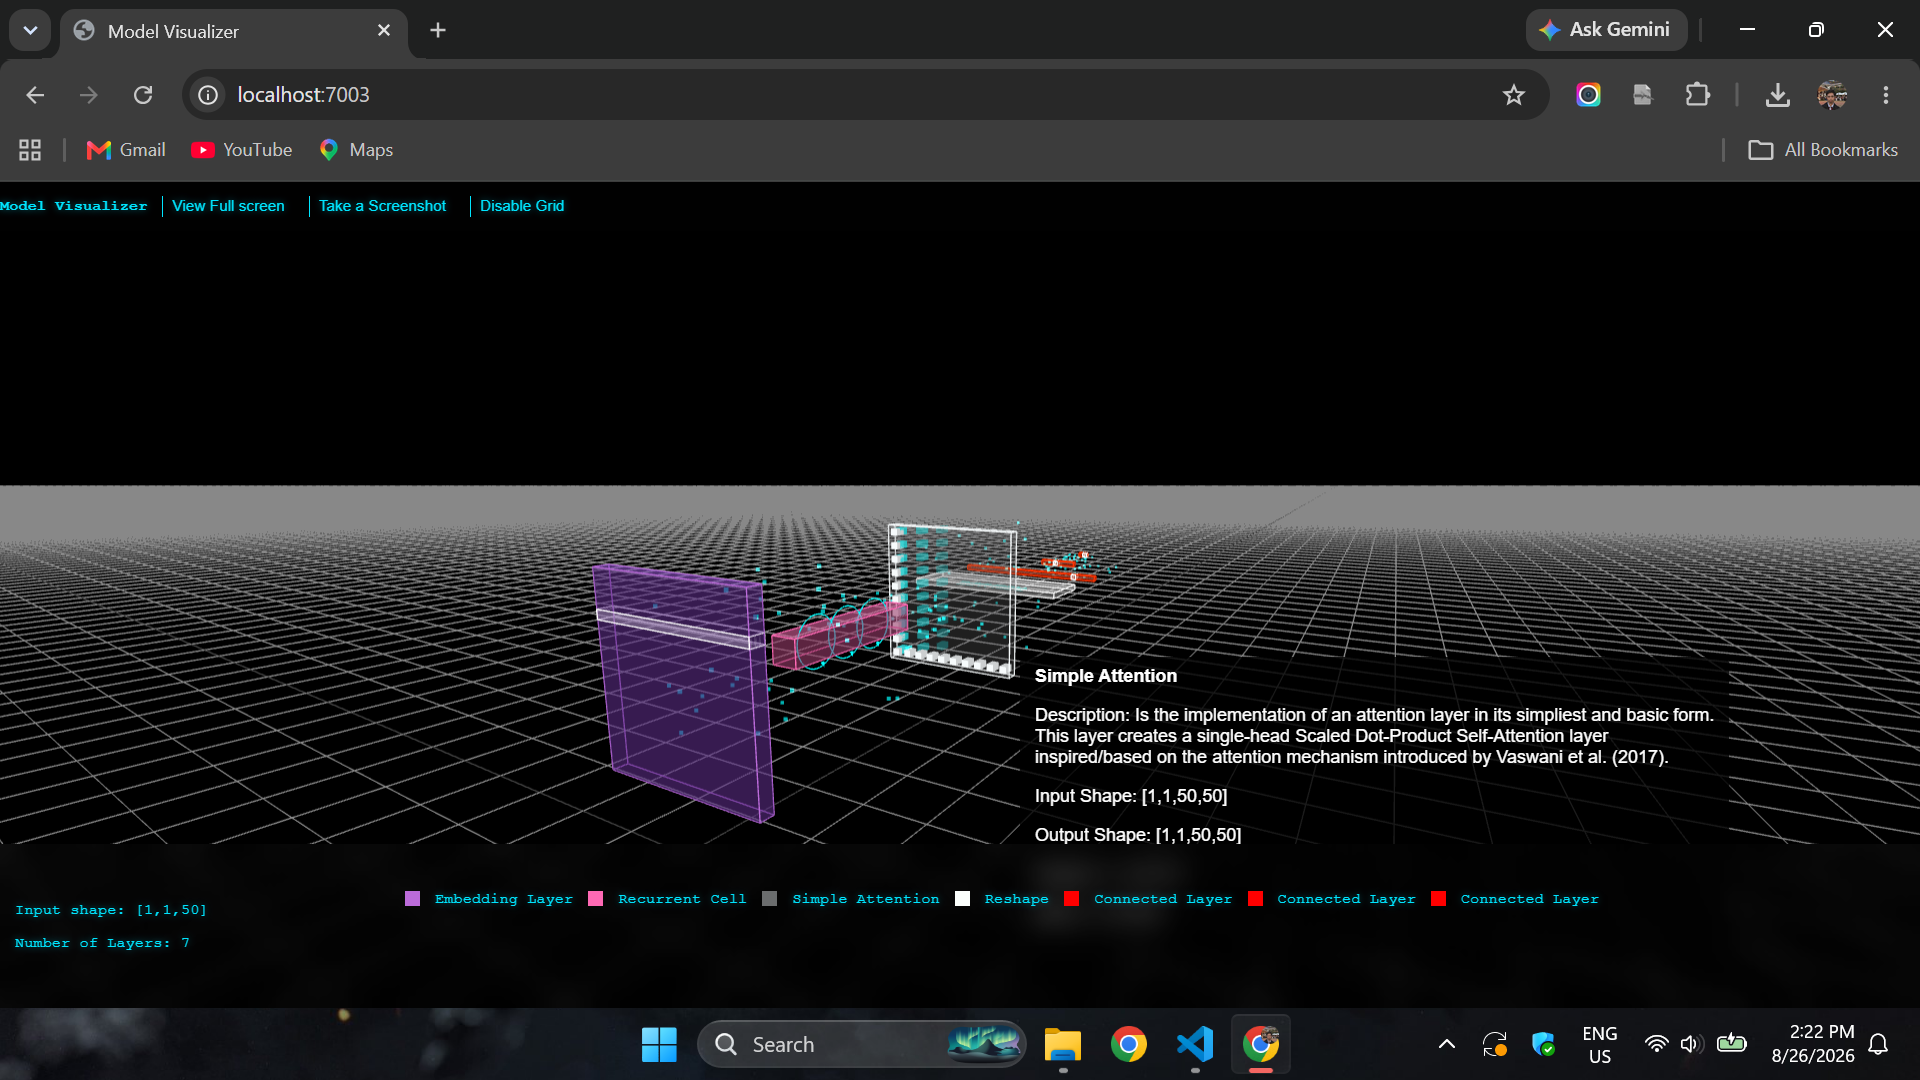
Use monitoring tool plugins to monitor training in real-time!
const { Neurex, Layers, lossVisualizer, modelVisualizer, lossLandscapeVisualizer } = require('neurex');

(async () => {
    const nrx = new Neurex();
    const layer = new Layers();

    nrx.sequentialBuild([
        layer.inputShape({height: 28, width: 28, depth: 1}),
        ...templates.simpleCNN(), // conv [3, 3] stride = 1 "same" -> maxPool [2, 2] stride = 2 "valid" -> conv [3, 3] stride = 1 "same" -> maxPool [2, 2] stride = 2 "valid" -> dense: 128 -> 64 -> 32
        layer.connectedLayer(10, 'softmax')
    ]);

    nrx.configure({
        /* ... other configs */
        visualizerPlugins: [
            modelVisualizer(),
            lossVisualizer(),
            lossLandscapeVisualizer()
        ]
    })

    await nrx.train(X, Y, 'categorical_cross_entropy', 1000, 12);

})()
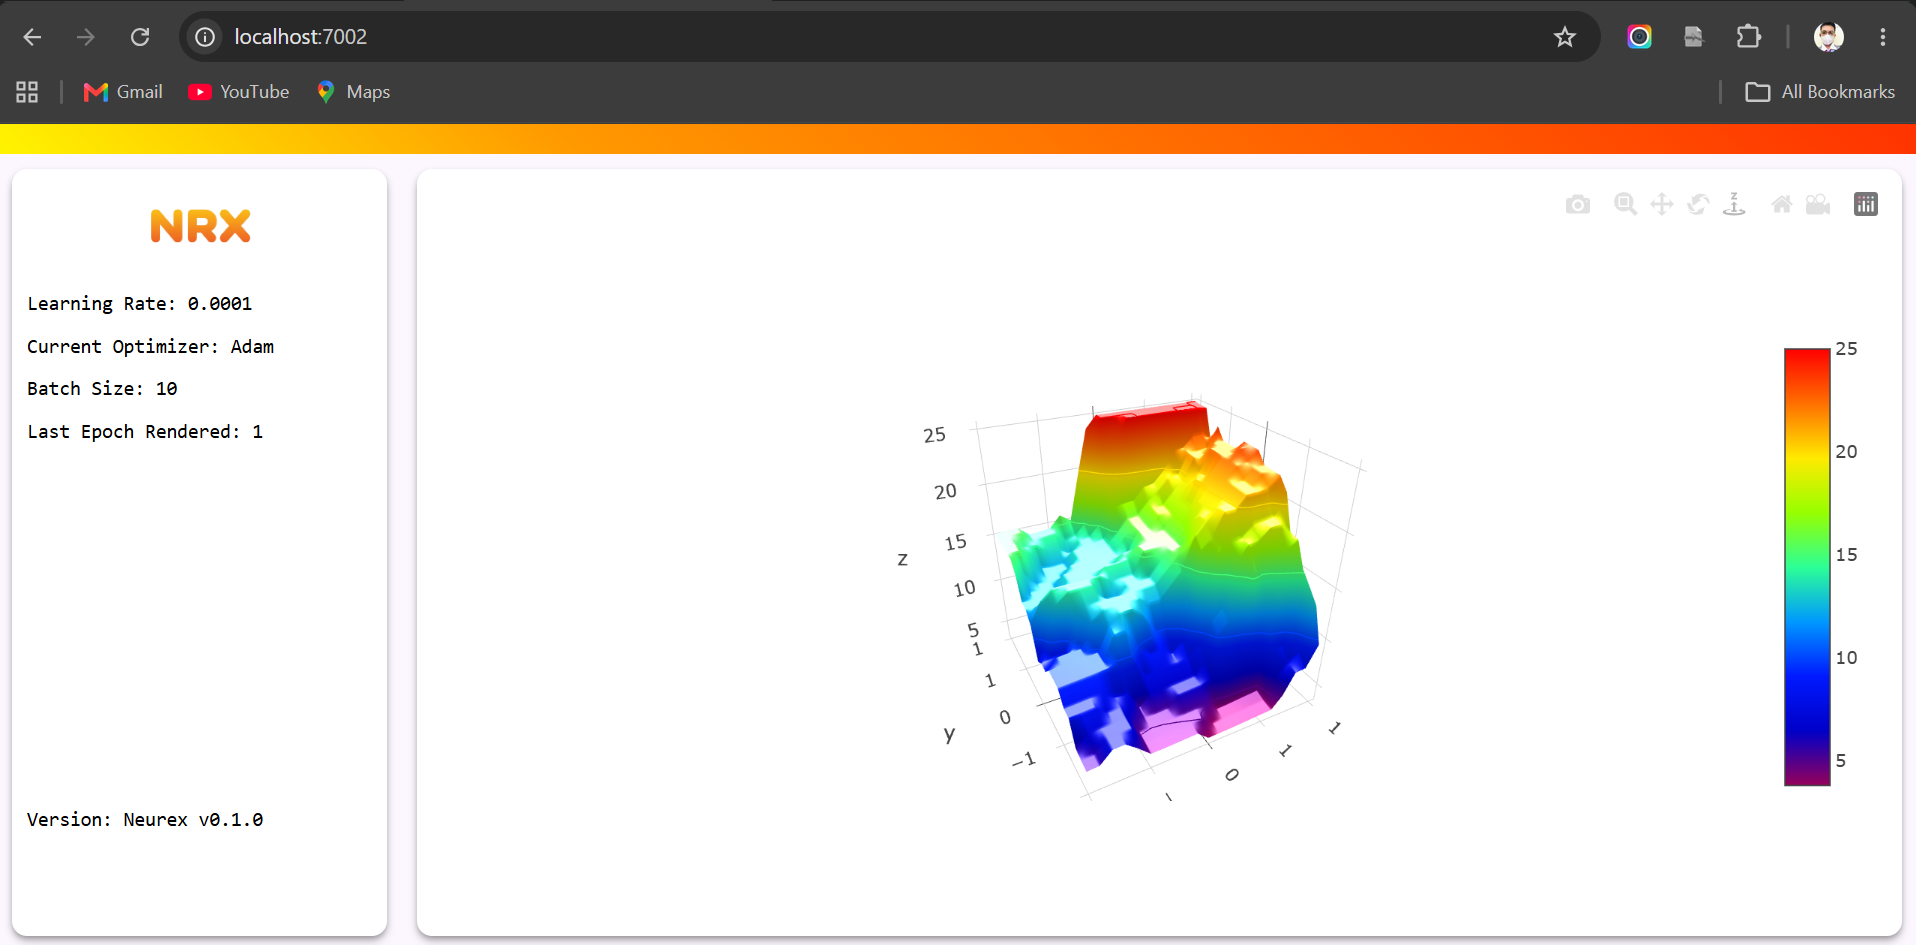
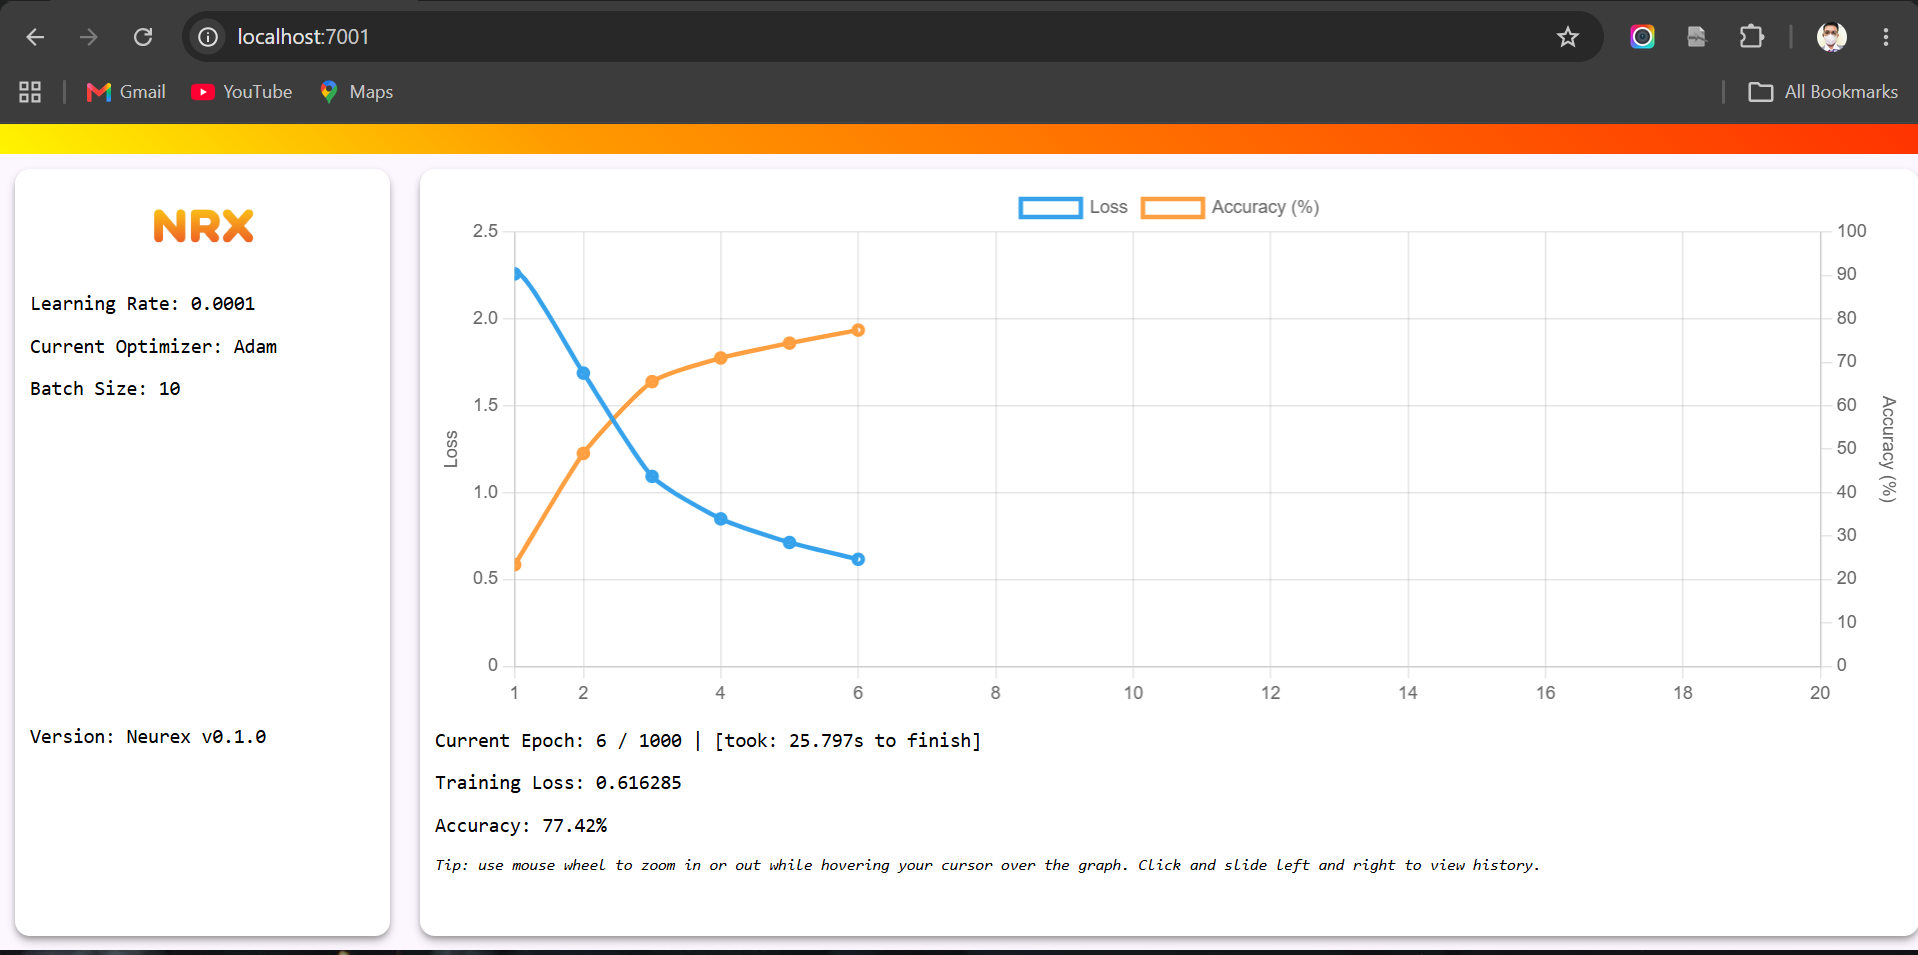
If you'd like to try the upcoming major updates before it is officially released on NPM, you can install the latest development version directly from GitHub.
npm install git+https://github.com/KarkAngelo114/Neurex.git- APIs may change without notice
- Some features may be incomplete
- Documentation may lag behind implementation
- Expect frequent updates and fixes
This is mainly intended for:
- early adopters
- contributors
- testers
- developers who want access to the newest features
Feedback and bug reports are highly appreciated 🙌